Build A Free Raspberry Pi IoT Cloud Server [Easy Guide]
Tired of being tethered to expensive cloud services for your IoT projects? Imagine unleashing the full potential of your smart devices with your very own, free, and customizable Raspberry Pi IoT cloud server. This isn't some pipe dream it's a tangible reality, and we're about to show you how to make it happen without emptying your wallet.
In an age where interconnected devices are becoming increasingly integral to our daily lives, the ability to manage and control them locally offers unparalleled benefits. A Raspberry Pi IoT cloud server free configuration allows you to take command of your IoT ecosystem, providing efficient management, scalability, and a valuable learning opportunity for anyone seeking to deepen their understanding of technology. Prepare yourself; this is an adventure you won't want to miss!
The adaptability of Raspberry Pi in the realm of IoT projects stands out as one of its most compelling attributes. From automating household tasks to developing sophisticated cloud-based systems, the possibilities are as vast as your imagination. And the best part? You can achieve all of this without incurring significant expenses. This guide will provide a comprehensive, step-by-step walkthrough of setting up your Raspberry Pi IoT cloud server free, presented in an accessible and easy-to-understand manner. Let's begin!
- Brooke Henderson Secrets Of Her Dating Life Golf Domination
- Filmyfly South Bollywood Hindi Your Ultimate Movie Destination Guide
| Category | Details |
|---|---|
| Topic | Raspberry Pi IoT Cloud Server |
| Key Benefit | Creating a free and customizable IoT cloud server. |
| Target Audience | Tech enthusiasts, hobbyists, and professionals interested in IoT. |
| Related Technologies | MQTT, Node-RED, InfluxDB, Grafana. |
| Reference Website | Raspberry Pi Official Website |
Let's be blunt. Whats the real reason you should consider Raspberry Pi for your IoT cloud server free endeavor? The Raspberry Pi is not just a minuscule computer; it is a significant asset for creators, hobbyists, and industry experts alike. The following factors highlight why it has become the preferred choice for IoT enthusiasts:
Firstly, the Raspberry Pi offers exceptional affordability. Acquiring one for less than $35 represents remarkable value, especially when compared to other single-board computers available. Furthermore, its compatibility with a diverse array of sensors, modules, and peripherals makes it exceedingly simple to incorporate into your IoT projects. Do you need to integrate a temperature sensor? Consider it done. Want to manage a smart lightbulb? It's entirely achievable.
Another significant advantage of the Raspberry Pi is the expansive support it receives from a large and active community. Numerous tutorials, forums, and libraries are available to assist you in resolving issues and expanding your projects. Regardless of whether you're a novice or a seasoned professional, you'll find the resources necessary to achieve success.
- Hd Hub 4 U Movies Is It Really The Best Streaming Platform
- Filmyfly Xyz Pro Is It Worth It Your Ultimate Guide
- Affordable and accessible hardware
- Wide range of compatible sensors and modules
- Strong community support with tons of resources
- Highly customizable and scalable
- Perfect for both small-scale and enterprise-level projects
It's crucial to remember the scalability aspect. Using Raspberry Pi, you have the flexibility to initiate projects on a modest scale and progressively broaden your IoT cloud server free setup as your requirements evolve. Whether your objective is to establish a home automation system or a weather monitoring station, the Raspberry Pi offers the resources and capabilities required.
Prior to delving into the setup procedure, it is crucial to enumerate the prerequisites for constructing your Raspberry Pi IoT cloud server free. Rest assured, the inventory is concise, and the majority of the items are either economical or potentially already present in your collection of technological equipment.
You will, of course, require a Raspberry Pi board as a primary component. While any model from Pi 3 onwards should be functional, the Raspberry Pi 4 is recommended for optimal performance. Following this, a microSD card is required to facilitate the installation of the operating system. A 16GB card should prove sufficient, although a 32GB card or larger may be preferable if significant data storage is anticipated.
Furthermore, it is essential to provide a power supply unit (PSU) that is appropriate for your Raspberry Pi. Verify that the PSU can deliver the necessary power for your specific model. It is advisable to use a high-quality USB-C cable for the Raspberry Pi 4. Finally, a case will be necessary to protect your Pi from dust and potential harm. Although a keyboard, mouse, and monitor are optional, remote configuration is also an option for individuals who are comfortable with this method.
- Raspberry Pi board (Pi 3 or higher)
- MicroSD card (16GB or higher)
- Power supply unit (PSU)
- Raspberry Pi case
- Optional: Keyboard, mouse, and monitor
That concludes the list! You're now prepared to commence your Raspberry Pi IoT cloud server free project with these fundamental components.
With the hardware now ready, its time to choose an operating system for your Raspberry Pi IoT cloud server free. This choice is vital, as it dictates the server's capabilities and performance.
Raspberry Pi OS, a Debian-based Linux distribution tailored for the Pi, is the most favored option. Lightweight, easy to install, and packed with tools, its perfect for Linux beginners.
However, if you plan on running more advanced IoT applications, consider alternatives like Ubuntu Server for Raspberry Pi or BalenaOS. These OSes are cloud and server-optimized, offering more flexibility for complex projects.
- Raspberry Pi OS (Recommended for beginners)
- Ubuntu Server for Raspberry Pi
- BalenaOS (For advanced IoT projects)
- Debian (If you prefer a more minimal setup)
Your OS selection should align with your project's specific needs. Research and choose the best fit.
Let's jump in and set up your Raspberry Pi IoT cloud server free. This might seem technical, but I'll guide you through each step. Get a coffee and lets get started!
First, download the operating system image and flash it onto your microSD card with Raspberry Pi Imager. Once installed, insert the microSD card into your Pi and power it up. For a headless setup (no monitor or keyboard), enable SSH and set up Wi-Fi by creating config files before booting.
After booting, log in via SSH or directly if using a monitor. Update the system with these commands:
sudo apt update && sudo apt upgrade
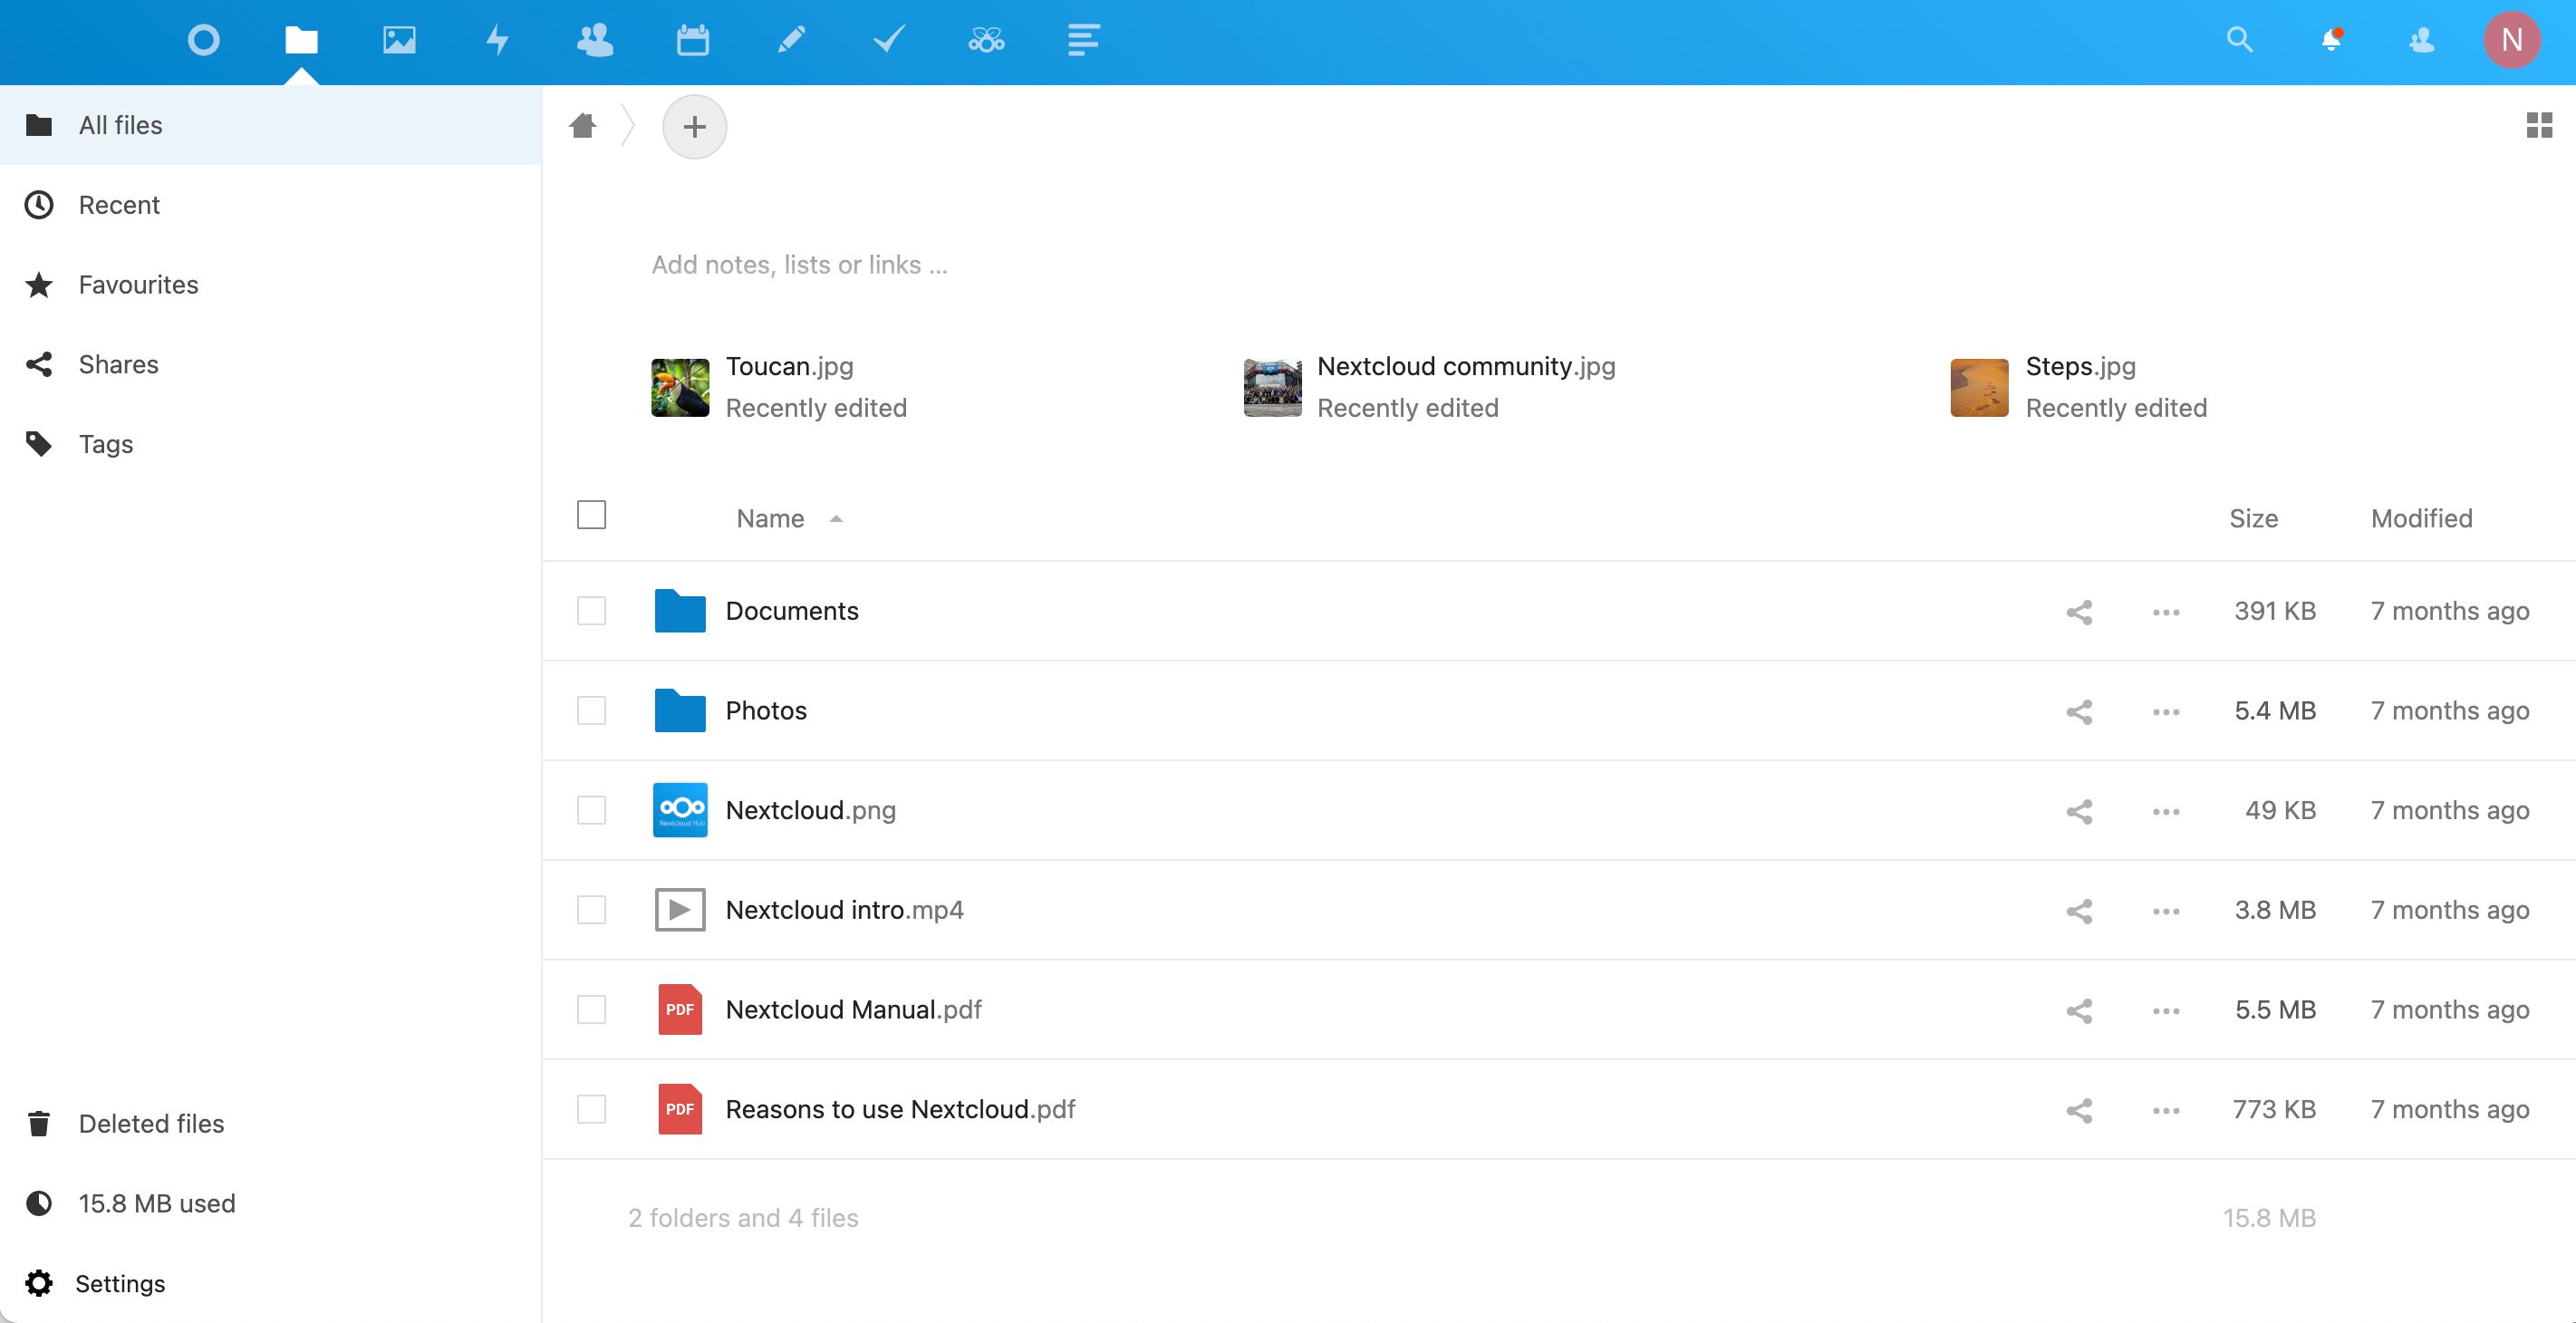
Once updated, install the necessary software for your IoT cloud server free setup, such as Mosquitto for MQTT, Node-RED for visual programming, or InfluxDB for data storage, depending on your project.
- Mosquitto (MQTT broker)
- Node-RED (Flow-based programming)
- InfluxDB (Time-series database)
- Grafana (Data visualization)
With these components, you'll have a fully functional IoT cloud server free setup, ready to manage devices and collect data.
With your server operational, connecting your IoT devices is the next step, bringing the setup to life. Whether youre using sensors, actuators, or smart home devices, connecting them to your Raspberry Pi IoT cloud server free is quite simple.
If using MQTT, connecting MQTT-enabled devices to your Mosquitto broker is easy. Configure the device to your Raspberry Pi's IP address and port. Then, use Node-RED to create flows to process incoming data.
For non-MQTT devices, additional libraries or APIs may be needed. Dont worry there are many resources to help you through this process.
- Use MQTT for seamless communication
- Configure devices to connect to your Raspberry Pi's IP address
- Utilize Node-RED for easy data processing
- Explore libraries and APIs for non-MQTT devices
Once connected, youll have an integrated IoT ecosystem powered by your Raspberry Pi IoT cloud server free.
Once your Raspberry Pi IoT cloud server free is running, managing and monitoring it is essential. Ensuring smooth operation and data security is critical.
Start with monitoring tools like Prometheus and Grafana to track server performance. These tools help you monitor resource use, detect anomalies, and fix issues before they escalate.
Security is also important. Enable a firewall, use strong passwords, and keep software updated. Consider a VPN for added protection, especially if the server is internet-facing.
- Set up monitoring tools like Prometheus and Grafana
- Enable a firewall and use strong passwords
- Keep your software updated
- Consider setting up a VPN for added security
Following these practices ensures your Raspberry Pi IoT cloud server free remains reliable and secure.
As your IoT projects grow, you might need more power and storage. Scaling your Raspberry Pi IoT cloud server free is relatively simple. Here are tips for expanding your setup:
First, upgrade your Raspberry Pi to a more powerful model if performance is lagging. The Raspberry Pi 4 offers better processing power and more RAM. You can also add external storage like USB drives or NAS to increase capacity.
Another option is to set up a cluster of Raspberry Pi boards working as a single server. This significantly boosts processing power and storage, ideal for large-scale IoT projects.
- Upgrade to a more powerful Raspberry Pi model
- Add external storage devices
- Set up a cluster of Raspberry Pi boards
- Optimize your software for better performance
With these scaling options, your Raspberry Pi IoT cloud server free can grow with your projects, providing the necessary resources.
A comprehensive guide to setting up your Raspberry Pi IoT cloud server free has been provided here. Weve covered selecting hardware and software, connecting devices, and scaling your setup. While building your own IoT cloud server may seem daunting initially, with the right resources and patience, you can get it running quickly.
Remember, experimentation is key. Try new things, explore software options, and push the limits of your Raspberry Pi. The IoT world is full of potential, and your Raspberry Pi IoT cloud server free unlocks it.
Grab your Raspberry Pi, collect your tools, and start building your IoT infrastructure. Share your experiences and projects with the community to enhance collective learning. Happy building!
Call to Action: If you found this guide helpful, leave a comment below and let us know how your Raspberry Pi IoT cloud server free setup is going. And if you're stuck or have questions, feel free to ask—we're here to help!
- Why Raspberry Pi for IoT Projects?
- What You Need to Get Started
- Choosing the Right Operating System
- Setting Up Your Raspberry Pi IoT Cloud Server Free
- Connecting Devices to Your Raspberry Pi IoT Cloud Server Free
- Managing and Monitoring Your IoT Cloud Server Free
- Scaling Your Raspberry Pi IoT Cloud Server Free
- Conclusion
- Discover Abby Berner The Rising Star Everyones Talking About
- Rachel Pizzolato The Untold Story Behind Her Fame You Wont Believe
Build your own cloud on a Raspberry Pi in one hour Slowmin
Raspberry Pi Cloud File Server Raspberry
3 Raspberry Pi Cloud Storage Software Solutions
